In this video, Master the Art of Homemade Pizza with Baking Steel we're hanging out with Andris at the Baking Steel studio for a fun pizza-making session. He's showing us how to create a delicious classic Margherita pizza using the awesome Baking Steel.
We kick things off with a special dough that's been fermenting for about 60 hours – perfect for that extra flavor and texture. Andris takes us through the whole process, from stretching the dough just right to adding a flavorful tomato sauce made from top-notch San Marzano tomatoes and fresh mozzarella cheese.
Our oven is preheated, and Andris gives us pro tips on using the broiler for that perfect crispy crust. As the pizza bakes, he answers your burning questions! We dive into the benefits of different flours, how to store tomato sauce, and the best ways to keep your baking steel clean and ready for action.
Andris also shares secrets on making multiple pizzas efficiently, and even how to use specialty flours like spelt for a unique twist. Plus, there's an exciting giveaway – one lucky viewer gets a Baking Steel of their own!
It's a jam-packed session full of tips, tricks, and mouth-watering pizza magic. So grab your apron and get ready to make the best pizza ever with Andris and Baking Steel!
Read below to follow along with the video to make sure you don't miss a thing.

Introduction and Dough Preparation
[00:00:02.480] All right, we got Andris here at the Baking Steel studio. Today, we are doing a pizza hangout. That just means I'm going to make a pizza, we're gonna hang out. I'm gonna make a classic margarita today, which I haven't done in a while. I've been tweaking mine a little bit just for fun and to add some more flavors to it. It's been awesome, and I love it.
[00:00:09.240] I'm using my Baking Steels, which have been in the oven for two hours, actually an hour and a half, preheating at about 450, top rack and bottom rack. We'll peek inside the oven in a little bit. You guys are amazing for coming today. I really appreciate you guys joining us and learning this process together, which I love.
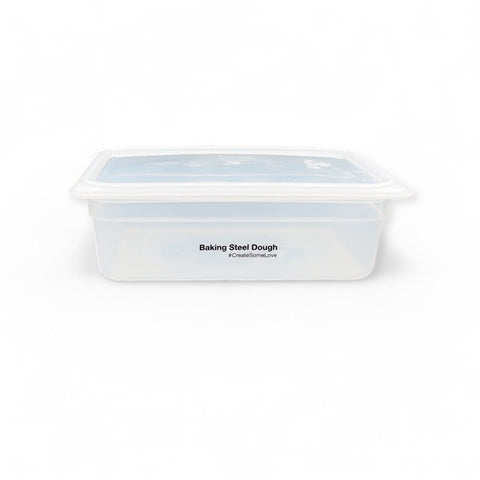
[00:00:43.520] Today, the dough we made was a 72-hour dough, but it's probably 48, it's probably about 60 hours. It's not quite at 72. I made the dough on Monday morning pretty early, mixed it, and then I left it in my dough container for about 24 hours at room temp, which to me is around 70-72 degrees. After that, it went in the fridge for the last two days. I got up early this morning, removed it from this container, and made two dough balls here. The rest of the dough's parked in the fridge again. I wanted to make two, and these balls have been sitting here since like 8:00 this morning, so they've been poofing for about four hours, which is ideal. That's the wheelhouse, three to four hours.
[00:01:41.960] Let me show you, I'll show you top down. Let's do it. We'll get right into pizza making here too. Switch cameras here. All right, when you get to questions today, drop them in the box. If I don't get to it, don't be afraid to type it in again, because we'll go through all the questions at the end.
Pizza Making Process
[00:02:00.399] I'm going to go right into making pizza right now. Let's do this. Hey, you can hear me? All right, for some reason, that top-down camera is not working. We'll work around it, okay? We'll try it again a little bit. I'm gonna move my camera down this way. We'll improvise, okay?
[00:02:12.440] This is my dough. It's been sitting in this container for two hours, I'm sorry, four hours. It's supple. I like to flour up a little and you can feel it. It's ready. It's been resting for four hours, which makes it really soft and cloud-like.
[00:02:22.000] Good, so here's our dough. I'm just going to remove one of the doughs here from the container. Just stick my spatula right underneath it. Here, I'll flour up my surface, place my dough right in the middle. Okay, it's coated nice with flour.
Ingredients and Tools
[00:02:52.200] Let's go through what I'm going to be using today to make the pizza. I'm going to be using tomato sauce, right? Crushed tomatoes, and I use these DOP San Marzano whole peeled tomatoes. They're amazing. It's a brand called Isola. I buy it at Whole Foods. I love them. All I do is we add a little bit of sea salt.
[00:03:07.040] And then for the cheese, we're using a fresh mozzarella. So I buy the cheese, and it looks like this, and these, this is Whole Foods again, right? It's in a plastic. What I do is I remove it, and I cube it up. This is about, about a half a cube, maybe a little bit more than half, and you can tear it by hand. I decide to use cubes. The only other tool I'm going to need today is a pizza peel, and I usually dust this off with a little semolina flour and a little flour. I'll just kind of brush it around and leave that aside.
Forming and Stretching the Dough
[00:03:59.400] Back to our dough. I'm not gonna even talk much. I'm just going to show you what I do here. That beautiful back of my knuckles, I'm letting gravity do all the work like a steering wheel. You see this? That gorgeous, little bit more, boom. Love those edges, the bubbles are beautiful. Now I'm going to place this back on my peel like this. That gorgeous, I'm going to pinch my edges here just a little bit, like a little tug. This just gives me a little bit of texture on the perimeter of my pizza, which I love. Makes every slice unique. When you bite into that crunch, it adds a nice texture. Probably stretches out to be about 10 inches. It's gorgeous.
Applying Sauce and Cheese
[00:05:03.240] Now for my sauce, I just take a little sauce and just kind of swirl it around, but bring my sauce close to the edge, but not over the edge. I don't want it to spill over onto my peel because then I have a mess. I always, always want my dough to slide like a puck. I have to make sure it's doing that at this point before I even do my cheese. I don't want to go to an oven where this pizza is not gonna slide off. Again, I'm just stretching it a little bit by hand. Looks really pretty, see the colors, that red. Gorgeous. Now for the cheese. Cheese spread out, right? I like this amount of cheese. I might go a little bit heavy on the sauce even. Feeling bold today. I've been lately going a little bit heavy on my sauce just because I like to, right? And that's it.
Baking Process and Techniques
[00:06:07.880] I want to go back to my camera. Sauce speaks through. And before I forget, someone here today is gonna win a Baking Steel. If you're in class at the end when we do that giveaway, we're going to randomly select one person to be a winner of a steel. If you have one, you'll have two. How nice is that? Anyway, my pizza's done, that's it.

[00:06:13.479] Let's talk about the oven. My oven's been preheating at 450 for one hour. I am going to switch it over now to broil. I have two options for broil: I have high or low. I go high. The reason I preheat at 450 versus 500 is I don't want my oven to get too hot. The reason is when I switch my oven to broil, if it's too hot, it will take several minutes to kick in the broiler. If I found it's like a trick, if I preheated at 450, the oven is not too hot, that broiler will go on, you'll see in like just less than a minute. I want that broiler to be ready hot and that's when I know that's my sign, my tell to go inside. When I launch, my back of my peel goes all the way to the back of my steel, right? And I just kind of shimmy it off, really take a deep breath. It's nerve-wracking, I know, but once I know it's loose, so all you do is touch base with my steel and then just slowly slide it back, and then we have our successful launch. Really easy. I'm going to do just a tad bit of oil on top, just a tiny bit. That's what I'm feeling, that's the vibe today. Okay, I'm gonna check in my oven. Let's go. I've got two steels, one on the top, one on the bottom. You see my broiler is fiery red, right? It's time to go in. So I'll bring my peel all the way back to my steel. I'll just shimmy it off, just like that. You see in there? Just like that. My broiler is hot, you see it's red. Those are up. I put my timer on two minutes just so I don't forget. After two minutes, what I will do is I'll rotate that pizza. I'll turn the broiler off. I'll rotate, cook it for another two maybe three minutes, and then we're done. We'll add some fresh basil, maybe some Parmigiano Reggiano on top, sprinkle some on there, layer a little bit more flavor, and it's going to be amazing. You'll see this thing work.
Q&A Session
[00:07:01.000] Let's get, I'm gonna get to some questions before this two minutes is up. Someone's asking when using the 72-hour frozen pizza dough, what is the process the day of making pizza? So if I know I have frozen dough in the freezer and I'm making, let's say today and I'm making pizza tomorrow, I'll remove it a day before and just put it in my fridge, let it thaw overnight. Seems to be very consistent, it'll definitely thaw out. Then in the morning, remove it three or four hours before bake time. If it's the same day I'm making pizza, then I'll remove it from the freezer, leave it at room temperature. It might take an hour and a halfish to two hours to thaw out and start to rise. You just don't want to overproof, if you will. But that tends to work. So at room temperature, you can leave it maybe three hours again, might be the same. Just be mindful of that. It's going to be frozen, so the time is just harder to nail down that final proof, if that makes sense.
[00:08:00.000] Let's peek inside. That's 90 seconds in, you can see we're starting to get some color, which is awesome, right? I'm just going to rotate a little bit. Really cool looking, close her up. I'm going to turn my broiler off, cancel that, and then go to bake up time, convection only. I'll do 475, I'll do another two minutes here, and I know I won't burn it too much. I was getting some color, top was getting close, the bottom not yet in two minutes, but you'll see after two more minutes now the bottom's going to catch up to the top and we'll have a pizza in like four or five minutes, which is amazing.
Multiples and Equipment
[00:09:00.000] Now if I was making multiples, the reason I have two steels in my oven, if I'm making multiples, I would essentially keep that broiler on and launch a new one on top and put the one that was on the top on the bottom steel. The idea there is I can make multiple pizzas in a session, so I can feed a lot of people consecutively with just making pizza after pizza. I might take a break after three pizzas and reset the oven, meaning I'll take the broiler off and just kind of cool it for a couple of minutes, let it settle in, and then we'll eat those two or three pizzas, and then we'll start making more. With two steels, you can make multiple. That's what we do in the class environment, we make a lot. Really fun.
Tomato Sauce
[00:10:00.000] How to get, okay, I am sorry, I'm confused. Do you make the sauce from the Isola tomatoes, or are you using the tomatoes later? Oh, no, I did, yes, that's all I have. These were the tomatoes I used. I just have them in a, I used another batch. I've got a lot of tomatoes. This is the can that I use though. Isola tomatoes, crushed. I crush them by hand or I might pulverize them with a food processor just for a couple of minutes to remove the chunks. If you like it chunky, just don't pulse it as much. If you like it medium, just a little bit of pulse, add sea salt. That's it. They're awesome.
Baking and Toppings
[00:10:11.199] There's other brands too. I just happen to be on a, I've been doing these lately and a lot of people prefer these over the other ones I've been using, so I switched over. All right, that's been four minutes. How this is looking, oh, it's got some color. Oh my goodness, let's go. I'm gonna pull it out. Wait for you to see this, it looks great. Let's see the pizza underneath, crispy, right? Saucy, let's go, let's go on top. Isn't that gorgeous, guys? You can see the light, it's really dark. It's got a lot of char on it. It's really pretty. See, I get some more, I'm gonna get some more light in here.
Final Touches
[00:11:00.000] So our next thing we do is grab some basil, right? Throw it on top. If you like basil, it's really nice. Fresh basil, there's obviously an abundance of it this time of year everywhere we look, which is great. I can add a little bit of Romano, just a little bit, right? And we have this really gorgeous pie. Isn't that color amazing? Crispy, right? It's saucy. It's really pretty. I can't wait to eat it. Let's see here, anybody around want to have a slice of this with me? Little lunch, that's great.
More Q&A
[00:12:00.000] Let's go back up, answer some more questions for you guys. Debbie asked why do I have two steels in one oven? Yes, why do I have two steels in my, well, we call it steel estate. I'm typically, if I'm making one pizza like I did today or two or even three, I only need one steel, I don't need to have two steels. However, what we found is that when we're having a party and I'm making pizza for eight people, having two steels is ideal. I can crank them out. I mean, literally I'll have two in the oven at the same time. After two minutes under the broiler, I move that to the bottom steel, I launch a new one on top, and after two minutes, I'm removing one, placing the top one down to the bottom, and a new one goes in. I continue that cycle, and by the way, you're working really fast, it works beautifully. Just more steel estate, so I get more hot spots in my oven, like a pizza restaurant, like a deck oven, I can just crank them out. Man, this pizza is just really pretty.
[00:12:11.839] And then is rule of thumb to preheat the steel at least one hour before use? Brenda, yes, good rule of thumb. One hour of preheat time, we find it like 45 minutes to an hour to be ideal. Today I was like an hour and 15 minutes of preheating. The more time that steel sits in that oven at, you know, 450 degrees, that heat's going to absorb inside the steel and it just transmits that heat even better. I mean, there's a point of, I think after an hour and a half, I don't think you're gaining any more heat. It's just, that's probably the max. If you will, you don't have to go four-hour preheat, for example. One hour, one hour and a half, I just like to have my oven on just to kind of check that box for my mise en place. So if I'm in here prepping, like chopping stuff up, making sauce, I want to have at least that box checked, my oven cranking, because you don't want to be early, you don't want to be late on the preheat, because then you can't make pizzas.
Beer Dough
[00:13:01.839] I have a batch of three-day beer dough fermenting, wow, I like that. That sounds great. Why does it call for twice as much yeast as your regular three-day dough? The last batch I made was the best ever. Huge bubbly, chewy crust. I have to go back and look at my notes on that, Bert. We did some testing on that, and with the beer in there, we just thought we would add a little bit more yeast. It's counterintuitive, you think the yeast from the beer would, you know, that didn't seem to do anything, so I think we just ended up doubling it, which is still micro, it's still two grams, which is minor, you know, it's not a lot. We just thought it would work great, and we were happy with our tests. Sounds like you were too, so happy to hear that. That's gonna be good, man, can't wait.
[00:14:00.000] And if anybody's asking beer dough, all we do, we make beer dough is we substitute one for one, we substitute the water for beer. So if it calls for, you know, one and a half cups of water, we just put in one and a half cups of beer, your favorite beer, no particular beer, just something that you like to drink, and you will taste it in the dough. It doesn't taste like strong beer, but there's definitely a hint of it, and it's tasty, it's really good. It makes a nice difference. Yeah, it's a beauty, jeez, it's really, gosh, the color of the crust, awesome, like incredible, crispy base, yeah, it's crispy, it's cooked, it's nice. And I got a lot of sauce on this one, you saw I went a little heavy than usual, so typically I might want to bake that for another minute to get it even more firm, but it's awesome.
Flour Types
[00:15:01.000] Great question, Steve's asking, what are my thoughts on double zero versus bread flour? We've again tested at 500 degrees on steel, and we like them both. Personally, we like the organic bread flours from like Central Milling to be ideal, like that's the sweet spot. Now that's my personal taste. I know, I think like Ali Stafford likes double zero better, she, that's her preference, so it's really a coin flip. They're both great flours. You want to get a good quality, high protein flour that can handle a two or three-day fermentation, and that's really, you might find some flours, like for example, an all-purpose flour can be very difficult to ferment for more than 24 hours because the gluten is not enough protein in there, it's going to break down too fast. And when I say break down, I mean when I go to stretch it, you're going to find yourself getting holes in your dough, and you're like, what's going on here? Well, typically that means that that fermentation may have been too long for that specific flour, and that's what causes those tears. Tears both ways, tear in the dough and tears in your eyes, right?
[00:16:00.000] Yeah, crispy base, we like it crispy. Eric, I like Central Milling's flours, all of them. I like the process, they're great. There's other good brands out there. There's a new one called Farm to Flour, which I have used, it's organic again, it's awesome, it's really nice. King Arthur makes a good one. There's so many good flours out there, guys. And oh, Cairn Springs, another great one. This is a great flour company too, organic, just awesome, awesome tasting flour.
[00:16:44.679] My thing is with flour is just experiment, like get out there and try different flours. You'll be amazed at the difference that you taste. And I might even combine them, I might use half a bread flour and half a double zero. That's another great idea, just try something, make it unique, make it your own, make it like your signature pizza, it's great. I hope that answers that.
Storing Tomato Sauce
[00:17:00.000] What is the best way to store tomato sauce beyond one week? Can it be frozen? Oh, that's a great question. I know canning is big, and canning can last months, right? I don't, we should do a process of it. I think Craig did it for us once back in Boston. I think it's just a matter of putting it in the can and like leaving it, you know, airtight. I don't know, for the sauce that I typically grind, I give it about five days in my fridge, and then that's about it. You might get some more after that, so three or four days probably ideal for your tomatoes. Obviously in the can, these things have a long expiration life. Let me see what this one is, if I can find it. Let's see, I don't even, it doesn't even have an expiration date on it. That's strange, Pomodoro. I don't see an expiration date on it, but I mean, typically they're on the can, just don't see it here. But years, probably right? Usually a year.
Cleaning the Steel
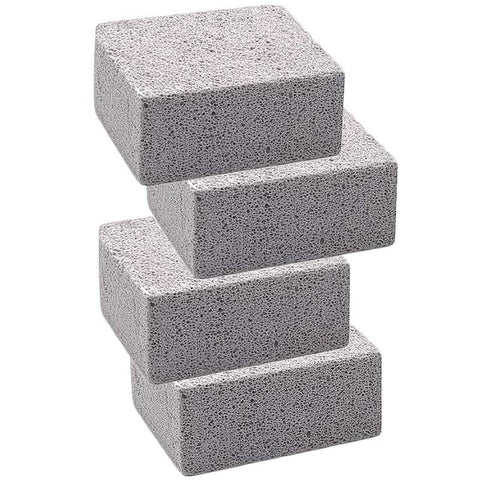
[00:18:00.000] Oh, thank you, Brenda. It's great. Oh, great question, Julie. How do I clean the steel? Let's get to that, that's really important. I will clean my steel tomorrow. If I'm using my, I'll probably use the oven a little bit more today. Then they're just too hot to touch, and I'll have flour caked on there, hopefully not too much sauce, etc., but it can happen. Tomorrow I'll come in and clean my steels. What that means to me is I'll just take them out of the oven when they'll be cool, I'll put them right in my sink, and I will use a dough scraper first, and I'll scrape off any residue that's on there. Then, with water, that's fine. These cleaning bricks, we have them on our website, Baking Steel cleaning bricks, they are phenomenal. What they do is they lightly scour the surface of your steel, and they keep that surface super smooth. It does not wash away or doesn't remove the seasoning on them. It's like a pumice stone, and it's called a grill stone too. I can use this on my grill. A little secret I've been doing with these, and again with caution, I clean my oven glass with this. This is recycled glass. I lightly scour, you could scratch the glass, so I'm not a glass expert. I take this, I lightly scour my glass in my oven with a little bit of water, and I have a clean glass all the time. It's amazing, I love it. But for my steels, these bricks, after I use the brick, after I scour my surface, so here's one, here's my mini grill steel, right? So I'll take my, you guys show me here, I've got this lightly scoured like this, and then soap and water, and I just dry it off with paper towels. After it's dry, you can see how dark this is, it's beautiful. My favorite steel, my mini, I use it all the time, right? Grill, I think I'm doing a grilled cheese later today too, phenomenal for this. The cleaning bricks will keep that steel super smooth to the touch. Highly recommend getting them, they're available on our site. I think we just got them back in stock, they're amazing. You're very welcome.
Specialty Flours
[00:19:00.000] Heather's asking thoughts on using flours like einkorn, rye, or spelt. Oh, Heather, amazing question. Let's see here. So one of my favorite pizza moments I had, it was in San Francisco. I've had two, well, I've had a thousand, but these ones really ring a bell because you mentioned spelt. I wanted to do something very unique for somebody, so I used 95% bread flour, my organic flour I use from Central Milling, and I added 5% spelt in my recipe. So that was like something a little bit unique, so talking like 25-30 grams in a 500-gram batch, right? That's it, of spelt in my flour, and it made a hint, a tiny hint of a difference in the flavor of that dough. I loved it. Now, I've got, you can go up to 20% maybe in spelt, in some of these flours. I would play around with the ratio. Just keep in mind they're very earthy, nutty flavors, so you don't want to overpower your dough with them or your breads. So I just take a micro amount, small amount, and tease it into my recipe. 5% is a good starting point, and that'll make it your own. It's a really good idea, so I highly recommend it for sure.
Fermentation Time
[00:20:00.000] Ever go longer than 24 hours on countertop outside? Yeah, that's a great question. Lane, I have. And what I've found is that the dough becomes almost too sour because it's fermenting almost too fast now, and it takes on, like even beyond like a sourdough, it's almost too powerful. So we keep it 24-hour max. In the summers, I might find myself going 12 hours, right? Depending on how hot it is and where I'm keeping that dough, but 24 seems to be a good max. Now, if it was cooler out, it was like 60 degrees, so in the winter maybe could go longer without too much of a difference. But again, 24 is just a good rule of thumb.
Sourdough
[00:21:00.000] Carl's asking, I have, yes, I have experimented with sourdough. I do like it. I don't even have my starter here. In fact, I left mine in Boston. I think I may have given it to Craig, and he just took it back home. I just never, I haven't even started a new one. No, I haven't started a starter. So my experience is good, I like it. I mean, I've made English muffins, breads, pizza, pizza dough obviously. I just find using yeast and teaching with that is very consistent, very easy with active dry yeast. I don't find the flavor to be better with sourdough. It's very cool to do it that way. If I made a lot of breads, I probably would use a sourdough just because it's so unique, and it's a cool thing. But yeah, other than that, I do not currently use one, but I do enjoy it.
Flour Brands
[00:22:00.000] Yes, Farm to Flour at Smart & Final, I was wondering about it, so I'm glad you mentioned it. Oh, that's cool, Vicki. Yeah, Vicki, highly recommend it. Great guys over there too, I would definitely use it and give it a shot. I've made English muffins, I've made bread, and I've made pizza with it. I love it, really good. And my kids like it too.
Multiple Pizzas
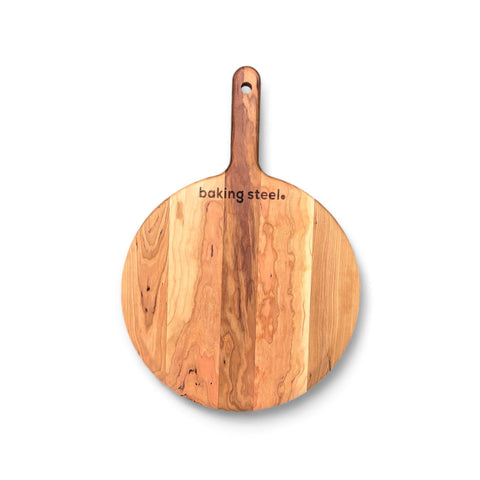
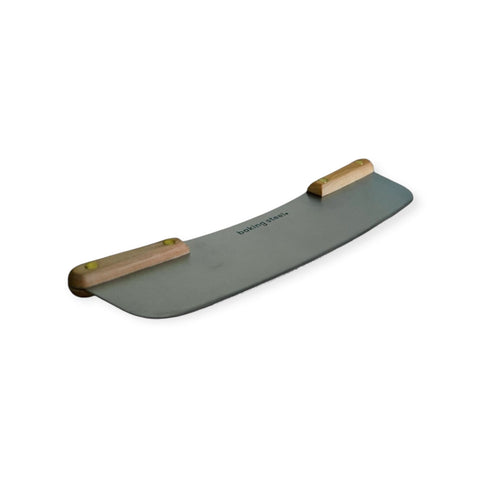
[00:23:00.000] When making multiple pizzas, can you shape the doughs on separate peels and have them resting until ready to prep and for how long? Oh, great question, Kate. Good question. So yes, let's talk about the peels for one second. Let me grab one. Here, we've got many, many different peels. Obviously the round ones like this. More back here. We got this big steel plus one, which is amazing because I can literally put, you know, two pizzas on at one time next to each other and launch two at a time, which is really cool. Same with baguettes and things. However, so my thing is with peels, our peels are made of cherry wood, I think. I use mine as a serving platter too. If you guys are here having pizza with me, and I'm making pizzas, I'm serving it, I'm gonna slice it right on the board and serve it like this. My pizza's done, I'm gonna just clean it off quick, so I can reuse that peel that evening. So I will use like three or four peels, even for, if I'm making ten pizzas, that's it. So I can kind of control the controllables, because you know when we're making pizza night, it's a mess, right? Flour's everywhere, etc. So we try to control the controllables. For me, instead of using like plates for everyone, I'm serving my pizzas on my wooden peels, so I like to have multiple of those.
[00:24:00.000] Now, can I stretch my doughs out? Yes, that's a great idea. Just be really careful when you pre-stretch your dough that you've got your flour and semolina flour on that dough so it's loose and right, and always give it a shake before you start topping, because you know if it sits too long it can get stuck on the peel, so just be mindful of that. But yeah, that's a good idea. You might even want to stretch your doughs out and leave them in flour on your countertop, and you don't have to stretch the dough out 100%, but even if you get it started at like 70 or 80%, then you put on your peel, you can kind of finish the stretching process. It's a really good idea when making multiples at one time, get those just done a little bit ahead.
Rust on Steel
[00:25:00.000] I'm glad that helps. Yes, my steel is a bit rusty. Eric, so if it gets rusty, Barkeeper's Friend and those cleaning bricks, amazing. Soap and water, dry it, add some seasoning to it. If it's getting rusty, you need to add layers. Anybody who has a Baking Steel, I have an electric oven here in the studio here, and to be honest, I do not season my steels much, if at all, because I don't really need to. The electric oven is a very, very dry environment. The steel stays in great shape, there's no moisture getting into it. A gas oven, on the other hand, each time you fire that up, it's gonna create some moisture inside your oven. That moisture can eat into your seasoning. So, and I had gas, I have a gas oven at my new home. I've got gas and electric, and my steel at home, I have to keep an eye on it. In other words, I want to add layers of seasoning before I can comfortably leave it in my gas oven all the time. My electric one, no problem, I just leave it in there because we obviously season your steel for you. Just be mindful, just add, if it's getting rusty, you don't have enough seasoning on it, so clean it off first, Barkeeper's Friend, cleaning bricks, dry it, and then season. I hope that helps, and we have a video I can send to you too with how to season steel.
Distance from Broiler
[00:26:00.000] I know the pizza bakes on the top shelf, but ovens can have different distances between top shelves and broilers. About how far away from the heating element should the pizza be? Great question. Let's go look inside my oven here. Let's do this. I'm going to show you what mine looks like. Right, you can see I've got my, that broiler is about five or six inches, probably six inches from my first steel. Then I've got a steel on the bottom rack of my oven, so I've got two. I like to have about five, at least five or six inches from the top. In my oven, that top one is a second rack. I have pushed it on the top rack, and what happens, it gets so hot up there that I end up burning the pizzas too quickly. So I drop it down to about six inches, that seems to be a good sweet spot for me where it's hot, but not too hot. For me, again, I know, and you can see the color of this pizza, this was about two minutes under the broiler. It was getting pretty dark, and if I had spent any more time than that, I probably would have burned it more, too much. So any case, for me, six inches is ideal. Good sweet spot.
Cleaning Bricks
[00:27:00.000] Debbie's asking about the cleaning brick. Are there concerns about residue on the steel? Any effect on the sink? That's a really good question, Debbie. So it's really like a pumice stone. These cleaning bricks, when I, it almost becomes like a powder when I scour. No, no incidents at all if I clog my drains. In my studio here, no way. My old studio in Boston, where we cooked a lot in there and we used these, never had an issue. My home's never had an issue. I use it on my grill, I use it everywhere, but there's been no, again, after I scour, I do rinse, I rinse it off, but no, nothing like that, no problems. And they're really safe, I think it's really safe.
Oven Compatibility
[00:28:00.000] I've been using my Ooni 12 more and my oven peel lately. Any plans on making a baking steel to fit it? Hey Bert, we do make some steels for the Oonis. I haven't kept up with what Ooni is doing, but we do offer, I know we have a couple that fit. I think we make one in particular for Ooni ovens that particularly fits right inside, so we do have them. You can email me, Andris at bakingsteel, and we can go through the sizes together.
Giveaway Announcement
[00:28:44.920] All right, I'm gonna give away a steel in just a minute too, guys. Okay, stay tight, hope no one's leaving. See here, boom, my daughter is type one diabetic. Oh, great, my daughter is type one diabetic. This, Lisa, is a really great question. Have you tried fermenting a dough for 72 hours and then testing her blood sugar? Because I have worked with some customers when I was in Boston, they used to buy my dough because it not spike their sugars, not their protein, didn't spike their sugars, which was amazing. So any, my thing is, you could try that first off. So a nice flour, organic, fermented for a few days. Again, it's healthier to digest this stuff than it is a one-day dough, especially with organic flours. Second, if that doesn't work and you don't want to test that, we do have a cauliflower recipe on our site. I'm happy to send it to you. If you can send me an email, Andris at bakingsteel.com, I'm happy to get it to you.
Drying the Steel
[00:30:00.000] Do you dry the steel like cast iron? I'm guessing. Do you dry it? Yes, is that what your question is, Chris? Sorry. I treat the steel just like cast iron, almost identical. It's, I just, if it gets wet, you dry it, if you will. And then just, our steel is not as brittle as cast iron, it's made differently, it's a lot stronger, but I treat it the same way, same properties.
Novice Pizza Maker
[00:31:00.000] I'm a novice pizza maker and I really appreciate everyone's questions. I'm learning a lot. Thank you and good information. Hey Amanda, super happy that works for me. And any questions, again, email, I'm happy to help.
Upcoming Classes
[00:32:00.000] I had the wrong time for the class and missed most of it. Will you do, yeah, hey Melanie, yes, we're gonna do this. In fact, we're gonna get back to doing more regular classes with more, even more guests, probably starting in July, no doubt. So yes, these are recorded, Melanie, so this email will be going out on Sunday from today's class.
Induction Cooking
[00:32:59.000] Is the bottom of my steel flat, wondering if this would work with an induction cooktop as a griddle? Any experience? Yes, hey, so Dan, great questions. Firepit bomb, the bomb, amazing. Made everything outside. Essentially, the baking steel works anywhere there's a heat source. The heat is going to spread out to that steel super evenly, so you can make it, it works anywhere. On the stove top, even now in induction, clearly. And they make these silicone mats for induction cooking you can place right on your oven and place your steel right on top of that. The heat will still go through and it won't slide if some people are nervous about scratching, etc. I've got an electric stove top here. You wanna see that? I'll show you my electric stove top just so you can get an idea of what I'm talking about. So this is my electric stove top and I can literally slide my steel back and forth from burner to burner. I do not do any damage to it. This steel is super smooth, it's awesome. I love it, I love my, these work great on induction. If you don't have the griddle, then that's fine too. Oops, sorry guys. Excuse me. The original steel will work on there, just be mindful of any fat, excess fats falling off the sides. I love the questions, these are amazing.
Drying Cast Iron
[00:34:00.000] For cast iron pans, I pop in the oven to dry. Oh yeah, Chris, good question. Yeah, so I put my cast iron pans to dry, throw it in the oven, then you'll know it's dry. Good idea. Yes, the same principle will work with steel. I even put it on my gas burner sometimes, but again, I have electric here, I'm not that concerned. It's the gas ovens that I'd be more concerned with. But if I do get it wet, I do want to make sure I dry it thoroughly. I always dry my steels.
Steel Giveaway
[00:35:00.000] And I'm gonna randomly select one person right now, by the way, so I hope everyone, let's be, oh, that's not even fair. Let's do this, here we go. Can I not do this right now? Something's not working. Here we go, ready, and Bert Frosi, Bert, you are the winner of this week's baking steel. So Bert, can you send me an email, Andris at bakingsteel, A-N-D-R-I-S at bakingsteel.com. We'll connect, we'll hook you up with a steel. Any more questions, you guys, and congratulations too, by the way, amazing. And by the way, we'll do this, I'm gonna give a steel away every time we do a class, just because it's fun. I love it. I love you guys, this is incredible. It's a great experience for me. I learn so much from being here with you that it helps us create content, blogs, helps us answer the questions. We get to learn more about our product because of you guys, all of the above. So I'm super pumped, super grateful for all of you. And if you have any more questions, again, send me an email.
[00:36:00.000] Hey, if you're watching this on YouTube, be sure to subscribe to our channel and send us comments, etc. We love them all, good or bad. So happy to hear that, Vicki. Thank you guys, that was awesome guys. Thank you, thanks, Debbie. You guys rock. Bert, I hope you got this, and we'll speak to you guys soon. All right, bye guys.
Congrats for finishing this class! Try out this recipe and get your own Baking Steel for perfectly crisp crust.