Steel-Baked Naan by Alexandra Stafford
*Alexandra uses the Original Baking Steel in place of a pizza stone
Years ago at a street fair in my town, I watched a man slap rounds of dough to the inside wall of a blazing hot tandoor oven. After just one minute, he would lower a long metal skewer into the oven and peel the blistered and bubbled naan from the wall. Before passing the charred rounds of bread to drooling customers hovering at his side, he brushed the surface with melted ghee.
After watching this performance and tasting the delectable naan, I coveted a tandoor almost as much as a wood-burning pizza oven. I've been on a Moroccan-cooking kick recently and have found myself buying masses of pita bread, flatbread, and that delicious Stonefire naan from the grocery store. I thought it was time to try my hand at a homemade version.
There are a dizzying number of recipes out there for naan, some calling for both baking powder and baking soda, many calling for yogurt and milk, some coated with oil before baking, others with water. I have tried a number of recipes these past few weeks, and this is my favorite. The dough is wet and sticky and requires no kneading. It's a little tricky to work with at first, but once you get the hang of it, getting freshly baked naan on the table is a breeze. I prefer using my hands versus a rolling pin to stretch the dough — this seems to create a more pliable finished product — but use whatever method you like. The dough is forgiving, and a little melted butter and sea salt at the end go a long way.
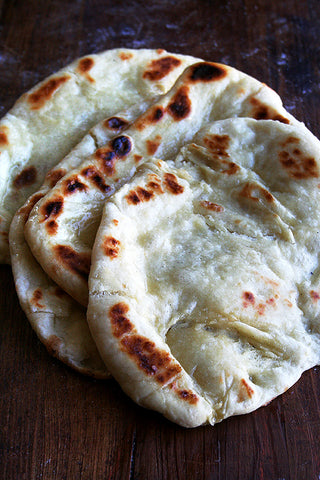
Naan
3/4 cup lukewarm water
1 teaspoon active dry or instant yeast
1 teaspoon sugar
2 tablespoons olive oil
2 tablespoons buttermilk or yogurt
2 cups (256g) flour
1 teaspoon kosher salt
melted butter for brushing
nice sea salt for sprinkling
1. Sprinkle yeast over lukewarm water. Sprinkle sugar over top. Let stand for 5 to 10 minutes or until foamy. (Note: If using instant yeast, this step is unnecessary. Simply mix the water, olive oil and buttermilk together; mix the yeast, sugar, flour and salt together; then combine wet and dry ingredients until mixed.)
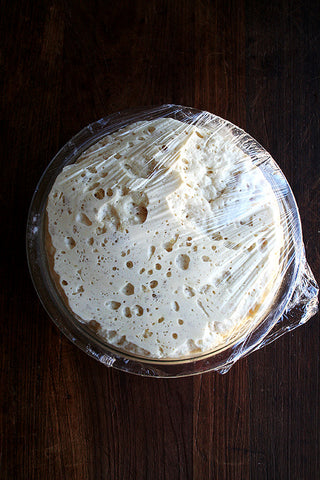
2. Whisk in olive oil and buttermilk (or yogurt). Sprinkle flour and salt over top. Mix until combined. Dough will be really wet and sticky. Cover bowl with a damp tea towel or plastic wrap and place in a warm spot. (Note: To create a warm spot, turn your oven on for 1 minute, then shut it off — it will be barely warm. You should be able to touch your hands to the grates without them burning you, but be careful while you test them out.)
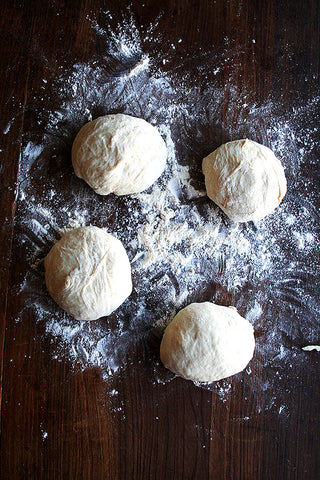
3. Let rise until doubled, 1 to 2 hours. Forty-five minutes before baking, place Steel in oven and preheat oven to 550ºF. Note: If your dough is in the oven rising, be sure to remove it. Turn dough out onto a floured work surface and turn dough to coat. Divide dough into 4 equal sections. Dough will be sticky, so just try to handle it minimally using as much flour as needed to keep it from sticking to your hands and your work surface. Shape each section into a ball and let rest for at least 20 minutes before shaping but up to an hour if necessary.
4. To shape the dough, you can use two approaches, and if you are up for experimenting, it's interesting to see how the different approaches produce different results.
Note: I find parchment paper to be necessary, not just convenient, when cooking naan on the Baking Steel — I had issued with sticking and too much charring when I didn't use the paper. It might be the buttermilk or the yogurt or the wet texture of the dough that causes the sticking/charring. That said, I've been coating the dough with water versus oil before baking, so it might be worthwhile trying one coated with oil. If you have success using oil or anything that prevents sticking, please report your method in the comments, and I'll report back, too, if I make any discoveries.
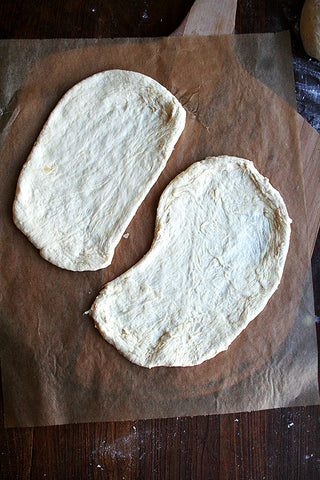
Method #1: Use a rolling pin to roll dough into an oval about 8 inches long, then transfer dough to a parchment paper-lined peel. Wet your fingers and lightly rub surface of dough with water. You can fit two of these ovals at a time on the Steel.
Method #2: Use your hands to gently stretch the dough, either in the air gently pulling the edges to stretch it evenly or along your board using all of your fingers to elongate it. Transfer dough to a parchment paper-lined peel. Again, you can fit two of these ovals at a time on the Steel. Wet your fingers and lightly rub surface of dough with water. My thoughts: I prefer not using a rolling pin. When I stretch the dough gently, I find I get nicer air pockets in the finished dough and that the naan itself remains more pliable after it has baked. When I use the rolling pin, the finished naan is stiffer, more like flatbread — still tasty, but not my preference as far as texture goes. The key I have found when using your hands versus is a rolling pin is to be sure to stretch the naan out as well as possible — if you don't get good length, parts of the naan will be really thick and doughy — again, delicious, but not the ideal texture for naan.
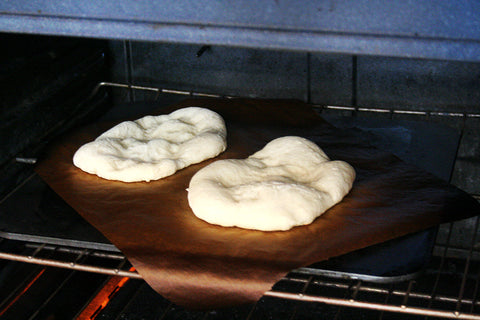
5. Shimmy naan onto Baking Steel. Bake two minutes. Flip using tongs. Bake 1 minute. Remove from oven. Brush with butter. Sprinkle with salt. Repeat with remaining two round.

For more recipes from Alexandra Stafford check out her blog: Alexandra Cooks. We also have a Naan Bread recipe, if you're not looking to go the pizza route.


